
Scroll down for post in English
Si en vuestra casa gusta el pollo tanto como en la mía os va a encantar esta receta básica y súper sencilla. Yo la empleo para tener una comida rápida y sabrosa casi sin esfuerzo. Es estupenda también para preparar con antelación y te saca de un apuro un día que no tienes cena. Puedes usar este pollo en otras recetas, trocearlo para ensaladas, sopas, tacos… Lo puedes guardar en la nevera en un recipiente hermético o lo puedes congelar si no lo vas a usar en unos días.
No hace mucho leí que una de las búsquedas más frecuentes de Google es “recetas de pechugas de pollo”. Me di cuenta entonces de que a pesar de que tengo muchas recetas de pollo en el blog, nunca había publicado la forma en la que más me gusta cocinar las pechugas. Y eso que las hago muchísimo. Hace años que uso este método que da como resultado pechugas muy sabrosas, tiernas, y muy jugosas, siendo esto último especialmente relevante porque, seamos sinceros, la pechuga de pollo, sobre todo si se hace al horno puede resultar bastante seca.
La razón por la que es tan fácil que las pechugas se resequen es porque tienen muy poquita grasa. Y precisamente es este bajo contenido en grasa una de las razones por las que nos gustan tanto, pero claro, cómo solucionamos esa falta de jugosidad? Es muy sencillo. Sólo hay que sazonarlas bien y sellarlas en una sartén o en la plancha antes de meterlas en el horno. Y una vez dentro del horno, hay que tener mucho cuidado de no hacerlas de más. El tiempo de horneado es crucial cuando se asan pechugas de pollo.
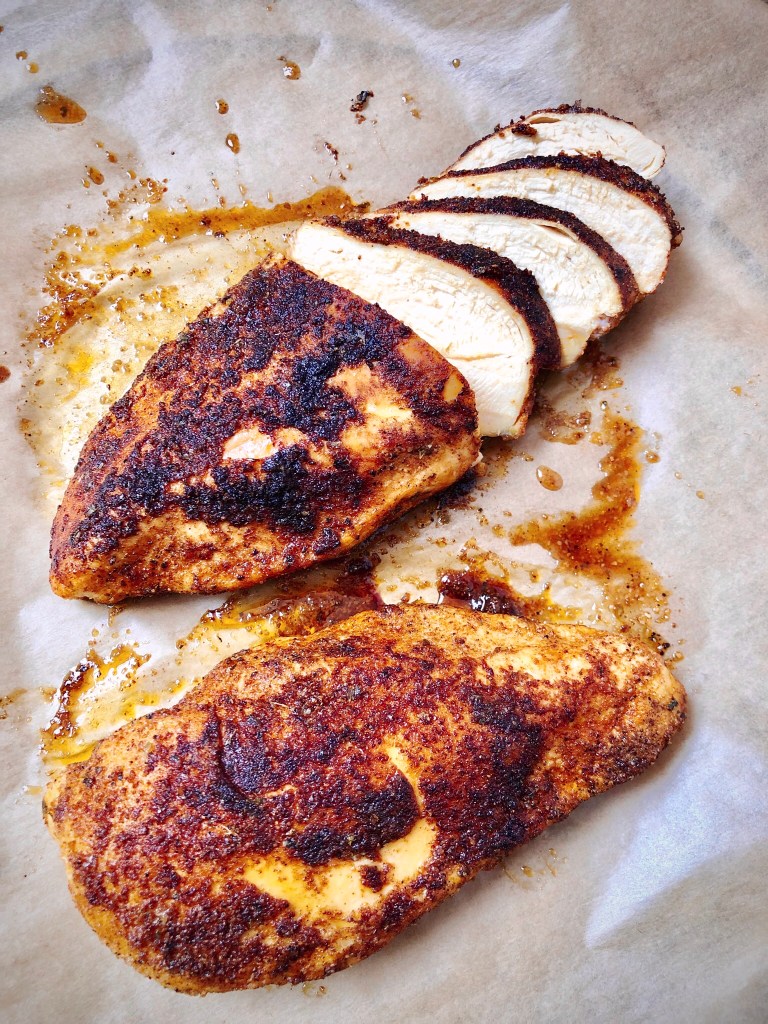
Estamos todos de acuerdo en que la mejor pechuga de pollo es la que tiene una ligera costrita tostada por fuera pero por dentro es tierna y jugosa. A menudo leo recetas de pechugas asadas que ponen el horno a muy alta temperatura buscando un asado rápido que dé como resultado esa costrita tostada por fuera. Aunque es un método que puede funcionar, en mi opinión es muy fácil pasarse de cocción y acabar con pechugas resecas. Creedme, lo he aprendido por las malas.
Sellar las pechugas antes de hornear proporciona ese toque más tostadito por fuera a la vez que deja todos los jugos dentro. Una vez selladas tan sólo hay que meterlas en el horno y aquí es donde hay que tener cuidado. El tiempo de horneado es casi seguro menos de lo que te imaginas. Yo horneo las pechugas durante 18 minutos si son medianitas y las grandes durante un máximo de 20 minutos. A 180C. Hay que tener en cuenta que si se usan otros cortes de pollo o si se usan pechugas con hueso hay que adaptar los tiempos de cocción. Las piezas con hueso siempre tardan más en asarse.
De todas formas, hay una forma infalible de asegurarse de no dejar las pechugas como una suelilla de zapato y es usar un termómetro de cocina. Son muy baratitos y una vez que te haces con uno lo usarás mucho y ya no tendrás que preguntarte nunca más si la carne estará medio cruda o si te habrás pasado. La carne de ave se considera que está hecha y es seguro comerla cuando alcanza una temperatura interna de 74C/165F.
Os dejo aquí un enlace a un termómetro digital que va de maravilla y está muy bien de precio y se puede guardar en cualquier cajón porque ocupa muy poco (que sé perfectamente que lo del espacio nos frena a todos mucho a la hora de acumular artilugios en la cocina)

Un último consejo para asegurar que las pechugas quedan jugosas. Es importantísimo asegurarse de dejar la carne REPOSAR al menos 5 minutos antes de cortarla. Esto es clave cuando cocinamos cualquier tipo de carne y ya sea que lo hagamos en en horno o en la plancha. Pero con pechugas asadas es incluso más importante. Después de haberles dado el golpe de calor al sellarlas y de que se hayan cocinado por dentro en el horno, todos los jugos están concentrados en el centro de la pieza, así que si lo cortas directamente en ese momento, los perderás todos y ya tienes pollo seco. El reposo permite a los jugos redistribuirse por toda la pechuga para que quede tierna y jugosa en todas partes.
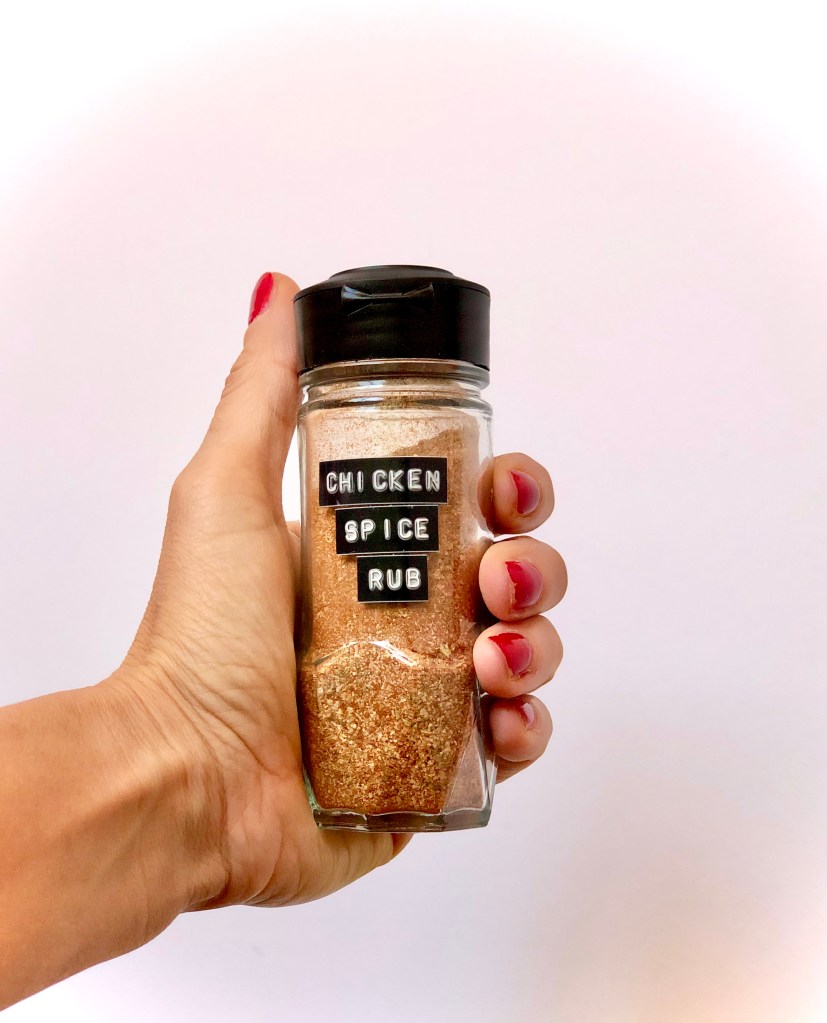
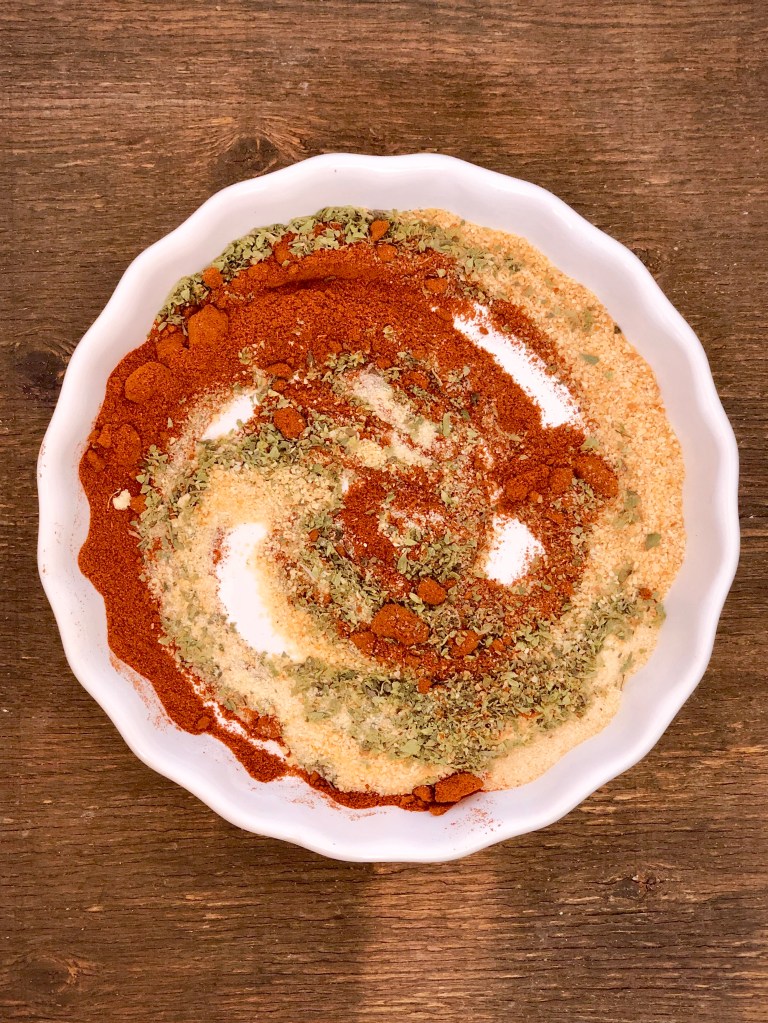
Y ya nos dejamos de hablar de técnica y hablemos de sabor. Llevo mucho tiempo usando esta receta de Mi Sazonador de Pollo Casero. Es la combinación ideal de especias hecha con cositas que todos tenemos en la despensa y que se hace en 2 minutos. Da como resultado un pollo con un sabor riquísimo siempre. Si preparáis pollo muy a menudo podéis aumentar las cantidades manteniendo las proporciones y tenerlo ya preparado y guardado en un tarrito hermético para que esté siempre listo para usar. A mí me encanta tenerlo así.
PECHUGAS DE POLLO AL HORNO SIEMPRE JUGOSAS
Ingredientes
- Dos pechugas de pollo
- Sal
- Pimienta
- 2 cucharadas soperas de Mi Sazonador de Pollo Casero
- 2 cucharadas soperas de aceite de oliva virgen extra
Pasos
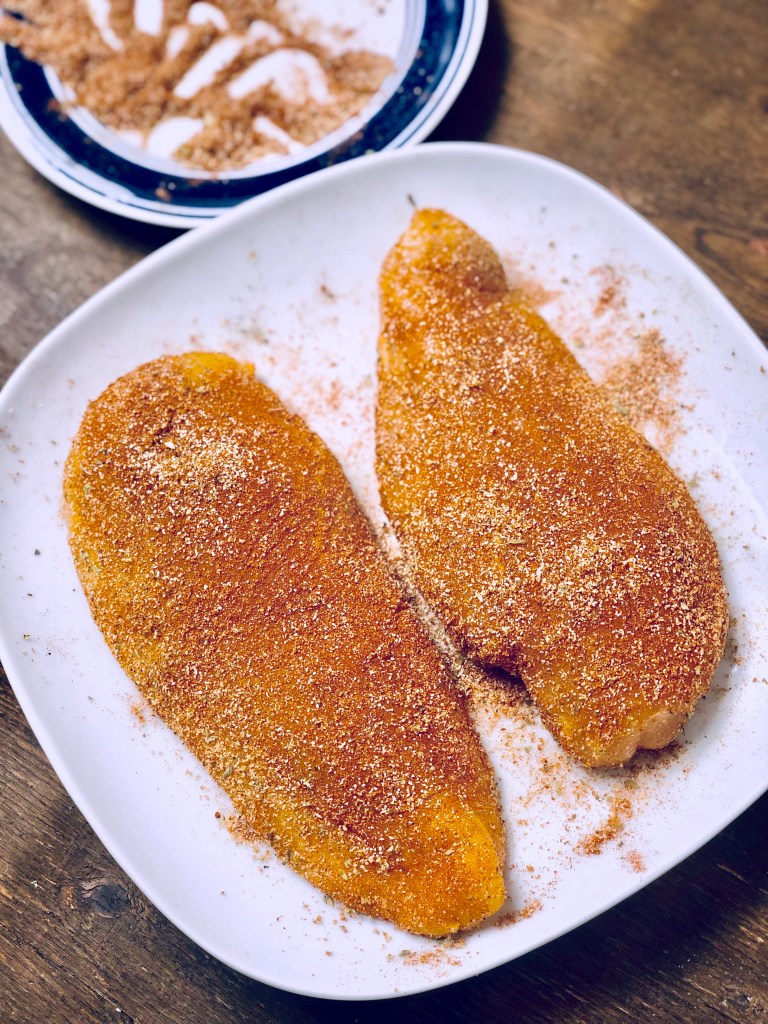
- Salpimetar el pollo generosamente con sal y pimienta.
- Espolvorear con Mi Sazonador de Pollo Casero y masajear la mezcla bien en el pollo hasta que quede bien recubierto.
- Dejar reposar en la nevera durante al menos una hora o hasta un máximo de 12 horas (este paso es opcional).
- Precalentar el horno a 180C/350F.
- En una sartén calentar el aceite a fuego medio y dorar las pechugas 2 minutos por cada lado. No hay que cocinarlas por dentro, tan sólo queremos sellarlas. Vigilar la temperatura del aceite para que no se queme el pimentón.
- Trasferir las pechugas a una fuente de horno y asar durante unos 18-20 min dependiendo del tamaño de las piezas. No asar demasiado tiempo o resultarán secas.
- Retirar del horno y dejar reposar al menos 5 minutos antes de cortar.
Os dejo aquí un vídeo para que veáis qué fácil!
Si te ha gustado esta receta me puedes dejar un like
EASY JUICY OVEN ROASTED CHICKEN BREASTS
Winner, winner, chicken dinner! If your family loves chicken as much as we do, you’ll love this simple basic recipe. I use it for a quick and easy dinner. Perfect for meal prep for an even quicker dinner or to add to soups and casseroles. Keep it in an airtight container in the fridge for a few days, or pop it in the freezer if you’re not using it right away.
I read somewhere that “chicken breast recipes” are one of the most highly searched things on Google. Then I realized that while I have a lot of chicken recipes, I had never posted my go to recipe for oven baked chicken breasts, and this is actually something I cook A LOT around here. For years I have been using a method that yields flavorful, tender and juicy chicken, which is important because let’s face it, chicken breasts, especially baked, are usually bone dry.
It’s so easy to dry out chicken breast because there’s very little fat in it. While this low fat content is one of the main reasons we love chicken breasts, it can be tricky to get them to not dry out. So how do you rectify that? Simple. I season them and pan sear them, and then bake at 350F being careful not to overbake them. Baking time is crucial here.
The best baked chicken breast is the one that gets slightly crispy on the outside but stays juicy and tender on the inside. Often I see recipes that bake chicken breasts at a higher temperature or even broil them for a few minutes at the end of the baking time trying to get the outer part of the chicken to crisp up. While this may work, it’s very easy to end up overcooking your chicken using that method. Believe me, I learned this the hard way.
Pan searing the seasoned chicken breasts first thing before baking will give you that nice crispy outside while locking all the juices inside. All you have to do after that is pop them in the oven. And here is where it gets a little tricky again. Baking time is probably less than you think. I usually bake my chicken breasts for 18 min for medium sized breasts and a maximum of 20 min for bigger ones. If you’re using chicken tenderloins or have a bone-in piece of chicken, you’ll need to adjust your time accordingly. Remember bone-in chicken takes longer to cook.
If you want to be sure, the easiest way to determine how long to cook your chicken breast is to use a meat thermometer. The digital ones work so well and will leave all the guesswork out. Poultry is cooked and safe to eat once it reaches 165F/74C internal temperature.
One last tip to make sure you end up with the juiciest most tender chicken breasts. Make sure to let your chicken REST. This is so important when cooking any meat, but especially with this recipe. After searing the chicken and cooking it in the oven the juices in the chicken quickly rush to the center, so when you cut into it right away, all those juices come pouring out and boom – dry chicken. Resting allows the juices to redistribute through the chicken breast and gives you a tender, juicy piece of meat every time.
And now let’s talk seasonings. I have been using My Favorite Chicken Spice Rub for years. It’s the best combination made with pantry staples that you can easily make in 2 minutes. Super flavorful chicken every time. If you cook chicken often make a big batch and store it in an airtight container and have it ready to use. I love to do that.
EASY JUICY OVEN ROASTED CHICKEN BREASTS
Ingredients
- 2 chicken breasts
- Salt to taste
- Pepper to taste
- 2 Tbsps of My Favorite Chicken Spice Rub
- 2 Tbsps Extra Virgin Olive Oil
Method
- Season chicken breasts with salt and pepper.
- Add Chicken Spice Rub and rub it well all over the chicken until well coated.
- Place chicken breasts in the refrigerator for at least one hour or up to 12 hours for the spices to release as much flavor into the meat as possible. (This step is optional).
- Preheat oven to 350F/180C.
- Heat olive oil on medium heat in a skillet and sear the chicken breasts until slightly browned (1-2 min per side). We don’t want to fully cook them at this point, we just want to get a nice sear and a bit of a crust.
- Transfer chicken breasts to a baking dish and roast in the oven for 18-20 min depending on size of the pieces. Do not overcook or the chicken will be dry.
- Remove from oven and let sit for at least 5 min before slicing if desired.
Scroll back up to the Spanish section of the recipe to see a video tutorial!
